Showing posts with label knitting. Show all posts

Sunday, 26 November 2017

Tips and things

I finished my last class for the year last week so hopefully over the next two months will free up time for my own projects. Yayyyyyyyyyyyy

Here's some tips I would like to share with you.

I bought yarn in a sale for a large coat/cardigan for next winter.  Since the yarn is in hanks, I thought I would pre-wind some into cakes before I start knitting.
To keep the cakes secure, store them in old clean stockings.


I am currently working on a unpaid commission for a group.  There is quite a bit of hand work and I have had some complications to work through with the fabrics chosen.  The wall hanging ( 1.8 mtrs square approx) is to look like metal and jewels.  The back ground is some form of man made fibre (unlabelled curtain remnant)  and the 12 jewels are each presented with different coloured silk.  To finish of the jewels I need a braid.  You can imagine how hard it is to find a specific colour which also has to match all the colours and fabric types in this piece.  In the end I had to make my braid.

I used two strips of the brass like braid and one narrow black and gold braid

Sewed the two brass braids together using my open toe applique foot, Zigzag stitch and marching thread.

Overlay the black/gold fine braid over my Zigzag stitches and hand stitched it down.

The braid is then hand stitched around each pieces of silk.  Notice the background fabric?
I have stitched it with out batting onto calico using matching embroidery thread 
to create the illusion of rough metal.

Every time I am in Napier I love to visit "Two Lippy Ladies". https://twolippyladies.co.nz/
They are renowned for their wonderful vintage dresses.  I love them and they are reasonably priced considering the amoung of fabric that goes into each dress.
Of course I left with a wonderful fun dress - fabric covered in sewing notions!  I wanted a petticoat to go under it.  They had some for sale but were made just from tulle and see through - not good for the Wellington Wind and not a good look for a lady in her late 50s!!.
I work with a clever colleague - Gemma.  She talked me through one of her petticoat designs.  Its essentially a tube petticoat.  I have included some tulle  but most of it is made from poplin.
My tip I want to share is sewing the elastic band on to the skirt.  The skirt before gathering is absolutely massive.  Pinning the elastic onto it was NOT fun.  I ended up with blood on my fabric and pins falling out as I worked my way round the band.  So instead of lots of pins, I tacked sections of the skirt to the band so when I sewed, I stretched and sewed between each section.  No more blood.


Tacked sections

My petticoat - I missed out one of Gemma's instructions so my layers are not even.

Check out the dress.  I love the fabric and design.  My petticoat is just a tad to low 
but I can roll it up is from the top.

Thank you for Reading my post.  Until next month - happy stitching
Shirls

P.S. - My result on using the shopping bags I made in my previous post.  The smaller bags worked ok but the larger didnt - two much stretch.  Better of with something more solid.

Sunday, 2 April 2017

Completed projects this year

I have been taking a wee break from quilting and have been focusing on knitting projects.  I have been testing out some patterns that we currently sell at Wellington Sewing Center, plus doing a little experimenting.

First project completed this year was my 7 kg blanket.  Its on display in the shop which I had to wheel it in my large suitcase.
I used 7 x 1kg bumps of Ashford corridale sliver - natural stripe, 25mm circular needles and casted on 50 stitches.
I used the window seat to support the weight of the blanket as I knitted it.

50 stitches + 7 bumps = queen size

Ashford corridale sliver

My next projects - a series of children's knitted garments.
Cleckheaton seamless sweater size 8 knitted in Cleakheaton natruals
This pattern is knitted from the neck down on circular needles.
I did have to purchase an extra ball from the pattern recommendation.


Same pattern but knitted in Shephard Colour 4 me. Size 4
Again I used one more ball than what the pattern recommended.
 
This is a little cutie by touch yarns.  Knitted in size 5-7 years.
Two double knit yarns knitted together.
I used 5 balls of 100gm Ashford DK Te kapo

I have been looking at yarn bowls.  Some of them are amazing and very beautiful.  I would break a ceramic bowl and the wooden ones would be heavy in my bag so I need something a bit more practical.
So I started experimenting last night and this is what I finished up with this morning.
Finished product
I crochet my bowl (instructions at the end of this post) using two strands of DK yarn.
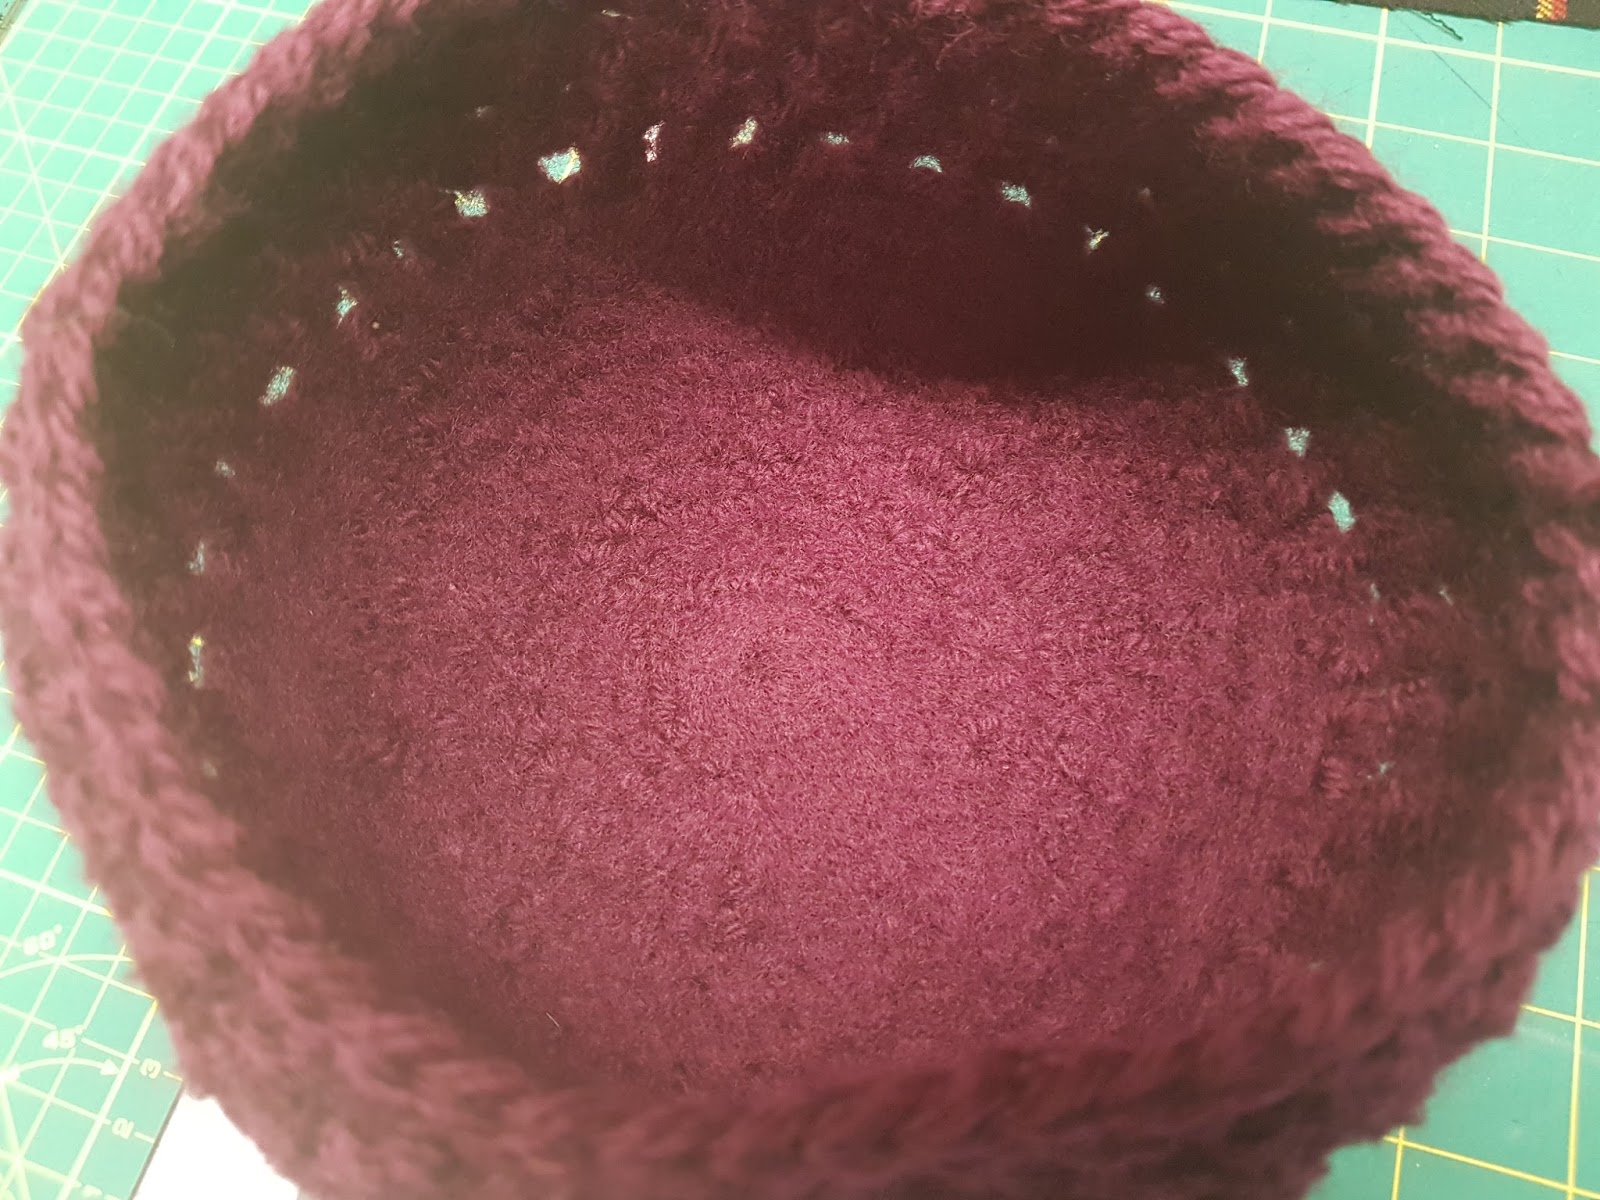
Then using my embellisher machine (mini felting machine), I felted the inside.
If you have one of these machines, place the right side facing up.  The felting will happen on the reverse.
Inside is felted
The outside still shows off the crochet stitches.


I created a loop and sewed on a shank button
Close the loop over your yarn and it should roll around nicely.
 
I felted the interior to prevent any loose wool fibres from attaching to the yarn I am knitting. I am using left over yarn from other projects but if your interested in making one, experiment with mixing yarns.  For example:
Here I am knitting the Hitchhikers shawl (Ravery by Martina Belm) using Ashford Opal sock yarn
to give a flash of colour and Alpaca Yarns 4ply as the base colour.

Now I struggle to read crochet patterns let alone write you a stitch by stitch account on how I made my bowl.  So hopefully you can follow these:
Using two strands of DK together make 4 chains into a round using hook size 6mm.
6 Double crochet to create a circle. 
Continue in double crochet rounds until the base if approx. 7" (18cm). Add 1 chain after each double crochet to keep your work flat.
(note: if you want a larger bowl, increase the base size)

This is my approximate width of the base.
Sides:
Continue double crochet for three rounds without adding a chain after every stitch.  Your work should curve thus creating the base of the sides.
Work four rounds of treble crochet or whatever design you like until the sides measure 3" (8cm).
Work two rounds of double crochet to finish.

Felting the inside created a more sturdy bowl.  If you don't want to felt your bowl then I suggest you double crochet up the sides to make it more sturdy.

Add bling or whatever you like to add your personal touch.

Happy stitching
Shirls


Sunday, 18 September 2016

Knitted Cushion Pattern

As promised on my "dontwaittocreate" facebook page, here is the pattern for my cushion.

I'm a girl who likes visual textures and its a real bonus if the texture is easy to create.  I have no idea what the name of this stitch is.  I watched a friend use it and the effect speaks for itself.

Here is my cushion using Natural Chunky wool supplied by Naturally Yarns

The lower half of this photo is the "right" side of the pattern.  The top is the "wrong" side.

I measured my cushion - 40cm wide x 45cm length
The length of your cast on stitches should be narrower than the width of your cushion to prevent it hanging loose on the sides.

Here's what I did.

Pattern Row 1: sl2 k1 (sl1 k1) repeat brackets until last two stitches k2
              Row 2: sl1 purl to the end (slipping the first stitch helps keep the sides straight)

p = purl, K = knit, Co = cast off, sl = slip stitch, m = make, pat = pattern

Cast on 70 stitches using 5.5mm needles
(if making a larger or smaller cushion cast on an even number)
Pattern until work measure 85cm ending with a purl row.

Building contrast section.
Next row (right side of work facing): purl
Next row: sl2 k1 (sl1 k1) repeat until last two stitches k2
Repeat the last two rows until work measures 97cm ending with a knit row

Button Holes
Next row: sl1 P15, CO2, P16, CO2, P16, CO2, P16
Next row:Sl2, pat13, m2 in next stitch, pat 15, m2 in next stitch, pat 15 m2 in next stitch, pat to end.
Next row P
Pattern 4 rows then cast off.

To make
With wrong side facing, fold beginning edge (start of work) up. 
Bring end or work (button hole section) down over lapping until the beginning edge lines up with the start of the button hole section (where the pattern changes).  This over lap can allow for adjustment to fit cushion size.
Pin side seams so your flap sides are in the correct place, turn work inside out and slip stitch the sides together.
Turn work so right side is facing.  Line up button holes, and mark for sewing on your buttons.
Insert your cushion.


I have used 1 1/2 hanks of this yarn.  With the left over yarn I made this cowl

Have fun
Shirls


Wednesday, 3 September 2014

Entrelac Knitting

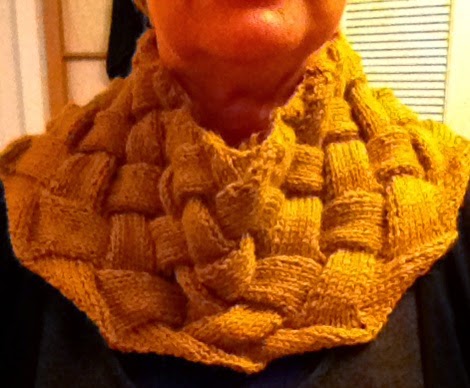
This style of knitting is really cool and I have purchased patterns from both Knittingdaily.com and Craftsy knitting site.  Both were for scarfs.  I prefer to wear cowls at work as they do not get in the way.

My first trial cowl is made with a gorgeous hand dyed Malabrigo  merino (12ply) from Holland Yarns in Petone (NZ).  I have knitted it length wise with the ends stitched together.   Its colourful and cosy to wear.  It was a little baggy so I have folded it over and stitched on a button.


My second cowl is knitted in  Indiecita baby alpaca DK yarn.  Using a solid colour definitely enhances the knitting pattern.
This time I knitted the cowl width wise.  Entrelac knitting works in blocks of eight stitches so I cast on 96 stitches.  This gave me one firm and one loose edge which enables me to wear this cowl in several different ways.


firm edge on the top of this cowl - loose edge at bottom.


Firm edge is on my shoulders - loose edge around my throat opening to the center.

Firm edge on my shoulders - loose edge around
 my throat opening to one side.
Loose edge on my shoulders with firm
 edge around my throat.
 
   
close up of the Entrelac knitting.


I'm about to start my third piece for a friend.  This time the cowl will be a little longer with button holes.  I will knit it length wise.  Will post when its finished.

Happy stitching friends.

Sunday, 24 March 2013

Current projects

This is mask sample two - I'm still experimenting using lace to make masks.  In this sample and the one in my previous post, I have used Powertex to harden my mask into shape.  This mask is made of  pink silk (shown) and unfortunately I'm not happy with the mask's final out come.  Powertex - although is transparent did change the silk's colour and appearance.  I have another plan so watch this space.
 
My dinning room which has been recently renovated and we built a window seat.  This room is a "quilt free zone".  So instead of having a quilt available to cuddle under while sitting here, I have knitted a blanket with a patchwork appearance.  Each block is knitted and I have crotchet them together.  Yarn used is Patons Jet - 10 ply.   Just a bit of fun.  Now to search for my next knitting project.
 

Happy creating


Tuesday, 23 October 2012

Knitting Bag - my latest design

After spending lots of time hunting for a knitting bag, I decided to design my own.  I have used Chunky King Cole Riot (Australian wool / acylic blend) and crochet using a size 4mm hook to ensure my crochet would appear tight.
Inside is made with cotton and bag stiffening.  Flower beads and buttons secure the inner to the outside cover.  I have used large plastic buttons on the bottom to ensure that my wool does not sit on dirty surfaces. Handles are leather.